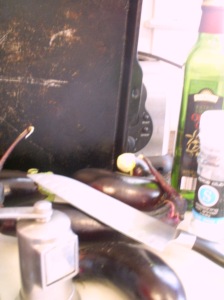
ROASTED EGGPLANT FROM THIS MORNING’S TRIP TO MY LOCAL FARMERS’ MARKET:
Preheat oven to 450 degrees:
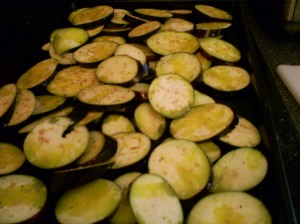
I sliced the eggplant about 1/8″ thick, or what looks like in the photo below:
Place eggplant in single layer, as much as possible, on baking tray. Drizzle olive oil–quite heavily, as eggplant are thirsty buggars–so that the bottom of the tray is moistened. Sprinkle with a round of sea salt and cracked pepper. Use your fingers to tossle eggplant about, so will be olive oil-coated. Spread back out.
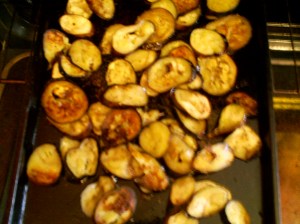
Check about half-way thru roasting, about 15min. Use a spatula to move about, turning over. In another 10 to 15 min. they should be done. You could also turn down the oven to 200 or 250 degrees if you want them to finish off more slowly, just to make sure will roast and not get too crispy. Depends on your oven, and how much you want to stay closeby to it. Either way, they should look something like this:
After all is done, you can do what I did. I cut up some of my market tomatoes and cucumbers (pickling size), sprinkled some sea salt on them, and accompanied all with some requisite pita bread. Worth every short minute to prepare.
Tomato-Cucumber-Onion Salad w/Feta
(To Serve 20-25)
10-15 small round or plum tomatoes or 6 – 8 large ones
5 – 6 pickling-size cucumbers, or 1 lg. English cucumber (peeled, or lightly peeled) With an English cucumber, I like to run a fork from top to bottom, all the way around the skin, before slicing. That way, you get a pretty look, with some peel flavor, as well. It’s up to your taste. Don’t worry, Kaukab won’t know of it.
1 med. red or sweet white onion, halved, then finely sliced crosswise (you can leave out, if you want only garlic)
3 – 4 avg. size garlic cloves, crushed/smashed–you decide (you can omit, if you want only onion flavor)
handful of mint, oregano (combined, or just of one herb) finely chopped
8 oz. feta cheese (crumbled), or can use less of the block version and crumble
1/4 C. Balsamic Vinegar (Can use Red Wine Vinegar to substitute.)
1/2 C. Extra Virgin Olive Oil
sea salt (start with 1/2tsp, or 4-5 grinds)
If using small tomatoes, thinly slice across width of tomatoes. If using larger ones, cut in half (vertically), then thinly slice each half. Place in large serving bowl. To that, add the thinly-sliced onion and cucumbers, as well as the smashed garlic. You can adjust the amount of garlic and onion, depending upon what kind of flavor you want. I often just use one or the other, but many like to use both. Just don’t overpower the tomatoes with too much of each. Add the herbs. Grind sea salt to taste, remembering to be a bit spare, at first, since the feta will add more saltly flavor. You can adjust at the end. Drizzle balsamic vinegar, so there’s enough liquid to settle in bottom of bowl–slowly pour as you move the bottle around the bowl a couple of times. Then do the same with the olive oil, only you’ll move around a couple more times, since you’re using more of it. I realize this technique is rather vague, and, perhaps, confusing, but, as I’ve mentioned previously, I don’t measure. Kaukab’s daughter was not encouraged to do so.
Crumble the feta and add. Mix together. The salad should have enough combination of the liquids to have a nice balsamic flavor, with enough olive oil to balance it out.
For an authentic (Kaukab’s way) version, please use the red wine vinegar in place of the balsamic.
KAUKAB’S LEBANESE-STYLE STUFFED SQUASHLETS
10 – 12 tiny green or yellow squash, cleaned out (see below for instructions and tips)
1 14.5 – 15 oz can diced tomatoes
1/2 lb. (or slightly more) ground chuck or ground round
1/2 small onion, finely diced
1/2 C. rice, give or take
5-spice, called Arabic Spice (they make a 7 spice, but 5 is what I use and all you need, but either would be fine)
salt
pepper
You’ll need a large saucepan like this one:
First, you’ll need to clean out the squashlets. Cut off the tops and a very slight slice at the bottoms to remove the little brown area, making sure to keep the bottoms from opening. I then use a small paring knife to cut a small incision into the top area and remove small piece. This is so I can then use the handle of a teaspoon to dig out the insides (pulp, flesh, whatever you want to call it). Hold the squash in your hand, and with the teaspoon handle, gently make circular scrapes, as you turn the squash to clean it out. It’s okay to leave a little behind. They’re small, so there won’t be huge gobs of it.
Once cleaned, you’re ready to fill them. First, you’ll need to make the filling.
Into a small bowl, put in meat, onions, rice (so there’s slightly more rice to meat ratio–just eyeball it), 1/4 of the canned tomatoes, 1 tsp. 5-spice or slightly more, 1/8tsp. each of salt and pepper, to taste. Mix to blend.
Use your teaspoon to scoop small amts. into the squash, using the handle to push it in after each scoop is placed on top of the squash. Place the filled squash, as you complete each one, into the saucepan. When all are in, pour remaining canned tomatoes over them and two canfuls of cold water. Add an additional 1 tsp. or 1 1/2 tsp. salt to the pot. Put lid on, partially tilted, and turn on med. high to bring to boil. Once boiling, turn down to med. low and cook for between 30 to 45min. or until squash are tender soft and meat looks browned and rice looks cooked. Also, the liquid will have reduced by about a 1/4, or so.
They should look something like these:
Remember to have pita bread with your squashlets. Kaukab would expect it. I like to toast mine atop the gas burner like this:
Serve all with a nice salad of Romaine and thinly sliced red onion dressed with lemon, olive oil, finely chopped fresh mint or a smidgen of dried mint or oregano, and a little sea salt. Absolutely yummy!
![]()
GREEN BEANS AND ROASTED POTATO SALAD W/ LEMON, DIJON DRESSING
Ingredients for veggies: Remember, I don’t cook with formal measurements, so these are eyeball estimates.
1lb. green beans or 1lb. frozen thin green beans (I used the latter, because I like them and they’re from Aldi’s)
20 – 25 small red or white “new” potatoes
2 small garlic cloves or 1 lg. one, thinly sliced
3/4 extra virgin olive oil
sea salt
cracked black pepper
Dressing: Again, these are eyeball estimates.
1 or 2 green onions (scallions), finely sliced
1 – 2 sprigs (each) of mint and oregano, finely chopped (it’s what I had in the garden, but you could use a variety of other herbs; tarragon would be nice, I think)
1 lg. lemon, or 2 small ones
2 T. dijon mustard
1/2C to 3/4 C. extra virgin olive oil
sea salt
cracked black pepper
Firstly, preheat oven to 400 or 450 degrees. (I used the higher temp. so that I could get nice brown skins, then turned down to 400 to finish them off.)
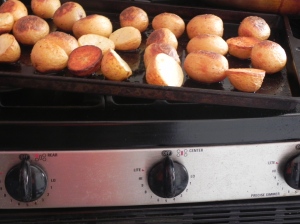
Place potatoes on a baking sheet and drizzle (liberally) olive oil and season with salt and pepper. Make sure all are well coated. Place in oven. They’ll look something like this when they’re done:
While potatoes are roasting, cook the green beans. Using a large saute pan (it’s just what I use; of course, you can use whatever you fancy), cover beans and bring to boil on high heat. Turn down to med. high and cook until beginning to soften. Drain and return beans to stove. Turn up to med. high heat, add olive oil (enough to coat and not burn beans) and saute for 2 – 3 minutes, tossing frequently. Add garlic, some salt and pepper to taste, and continue sauteeing until beans become a bit dull in color and softened, but not overly so. It will look something like this:
Once done, allow to cool. You could pass the time in any number of ways, but since I had a church potluck to get to, I elected to make the dressing. You do as you like. No judgement.
Dressing:
Assemble your ingredients:
First, squeeze lemons into small bowl. Add dijon–start with 1T. (you can add the rest to adjust
for taste,after you’ve added other ingredients) and whisk. Slowly whisk in the olive oil, so that you’ve got roughly a 2:1 olive oil: lemon ratio. Toss in onions and herbs.Then salt and pepper to taste.
In a large bowl, combine cooled potatoes and beans (you could do this as a hot/warm salad and it would be good, too). Slowly pour dressing atop mixture, then gently toss through. Add more salt, if needed.
POACHED PEARS/W GORGONZOLA
6 or 7 small pears
8-10 whole peppercorns
5 or 6 oz. balsamic vinegar
1/2 C water
2T sugar
lemon zest
1/2 C raspberries (frozen or fresh–I used frozen, because didn’t have any fresh) Raspberry Liquor would be good, too. Use a couple tablespoons.
capful of vanilla extract, or 1 vanilla bean
Combine all ingredients and simmer on med. heat. Once begins to simmer, place pears in the balsamic bath, turn down to low simmer and cover. Periodically, uncover to baste with liquid and feel for tenderness, about 20 to 25min.
They’re done when you press them gently and they spring back. Remove from pot and set aside in bowl. Meanwhile, turn up the heat to med. high and allow the balsamic liquid to further reduce–about 15min. Let cool.
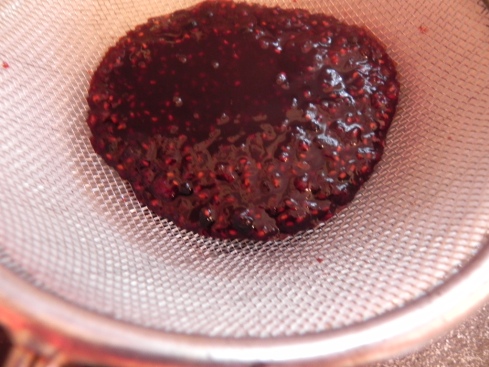
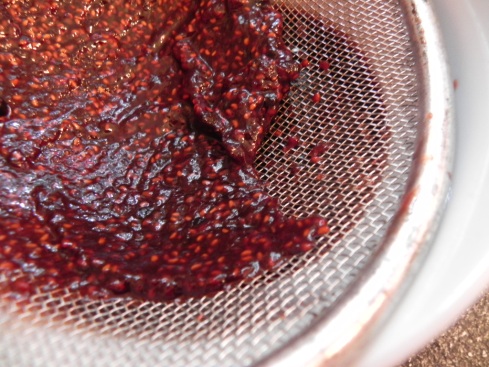
Now you’re ready to strain.
Pour a little of the reduction on the bottom of a pretty serving dish and set the poached pear atop. I like to serve it with a small wedge of sharp cheese–gorgonzola is one of my favorites.











These are so very delicious!
Thanks, Agnes.
Wait ’til you see what I’ve got cookin’ for the Fourth. Pictures and recipes to follow.